

Planning a trip to Japan? Visit Japan Web is the Japanese government’s free online service for preparing arrival information. Using it before your flight can make the paperwork easier, but it is optional and does not replace a visa, your passport or permission to enter Japan. If you do not use it, follow the paper/manual arrival procedures; Japan Customs still accepts paper declarations.
Guide checked on 29 October 2026 (Malaysia time). Immigration clearance and customs declaration now share one combined QR code. Japan introduced this change on 25 January 2024. The original screenshots below are retained as historical illustrations: their menus, separate QR codes and screen order may differ from the live service. Follow the updated text and official current instructions, not the old separate-code screens.
Registering Visit Japan Web Account
Step 1 – Check your passport and entry eligibility first. Japan requires your passport to remain valid during your stay; the Japanese Embassy in Malaysia says there is no six-month Japan-entry rule. Separately, Malaysia’s outbound travel guidance calls for at least six months’ passport validity remaining. Check any transit-country and airline requirements too. Do not interpret this as a Japan rule requiring six months beyond your return date. Malaysian ordinary-passport holders can generally visit Japan visa-free for eligible short stays of up to 90 days, without paid activities; other purposes or travel documents may require a visa.
Step 2 – Start from the official Visit Japan Web page. Japan Customs confirms the service is free; avoid lookalike sites charging a registration fee.
Step 3 – Select Start using the service now. The position and wording of buttons can change.
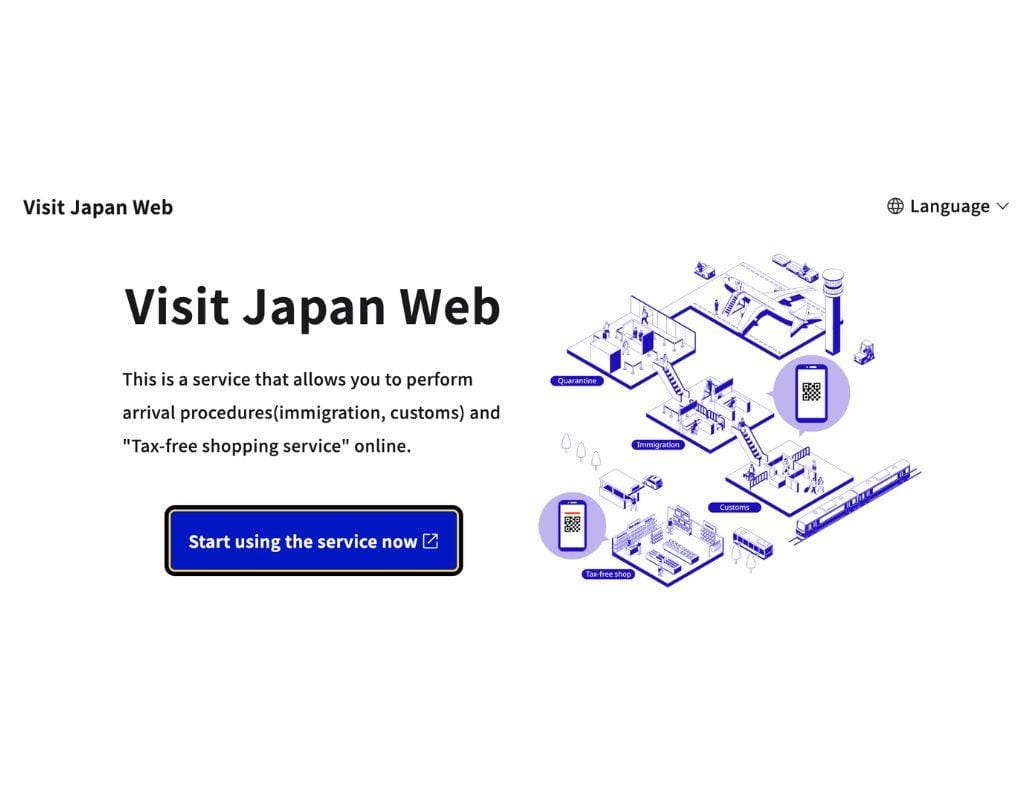
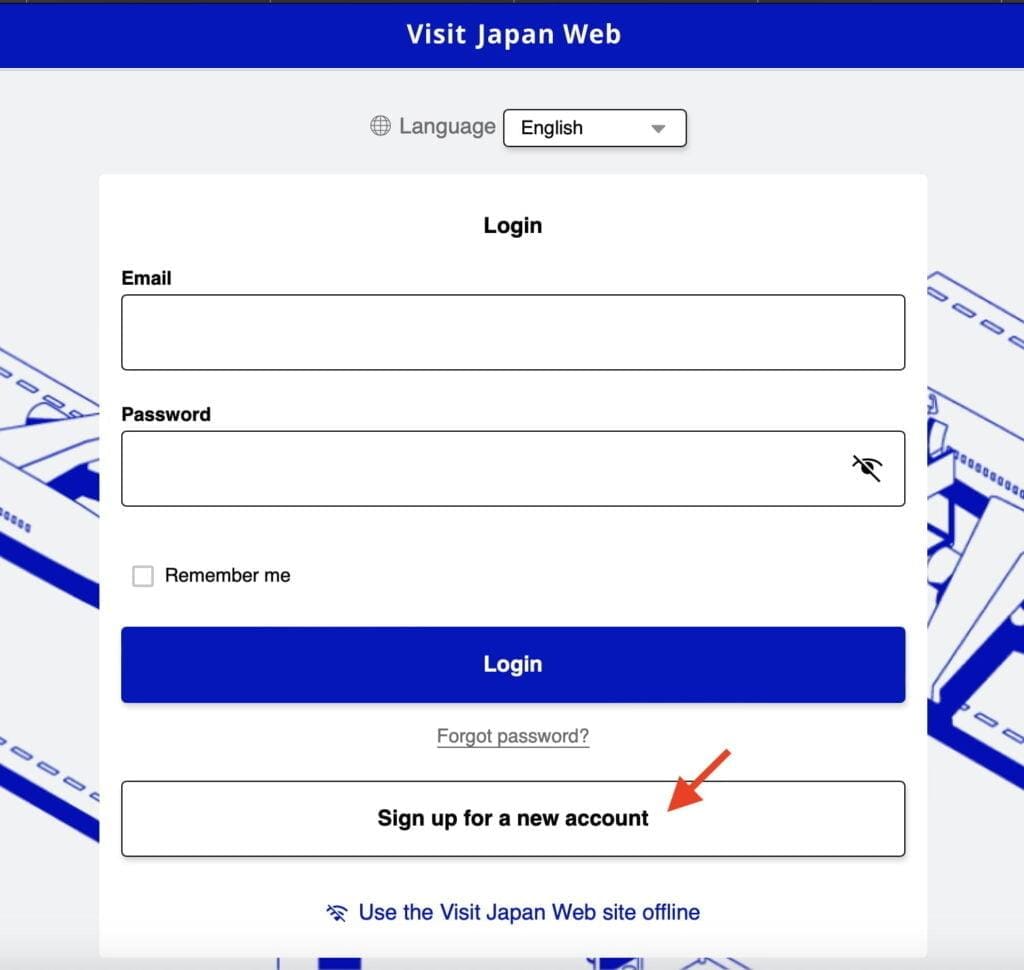
Step 4 – Click “Sign Up for a New Account“
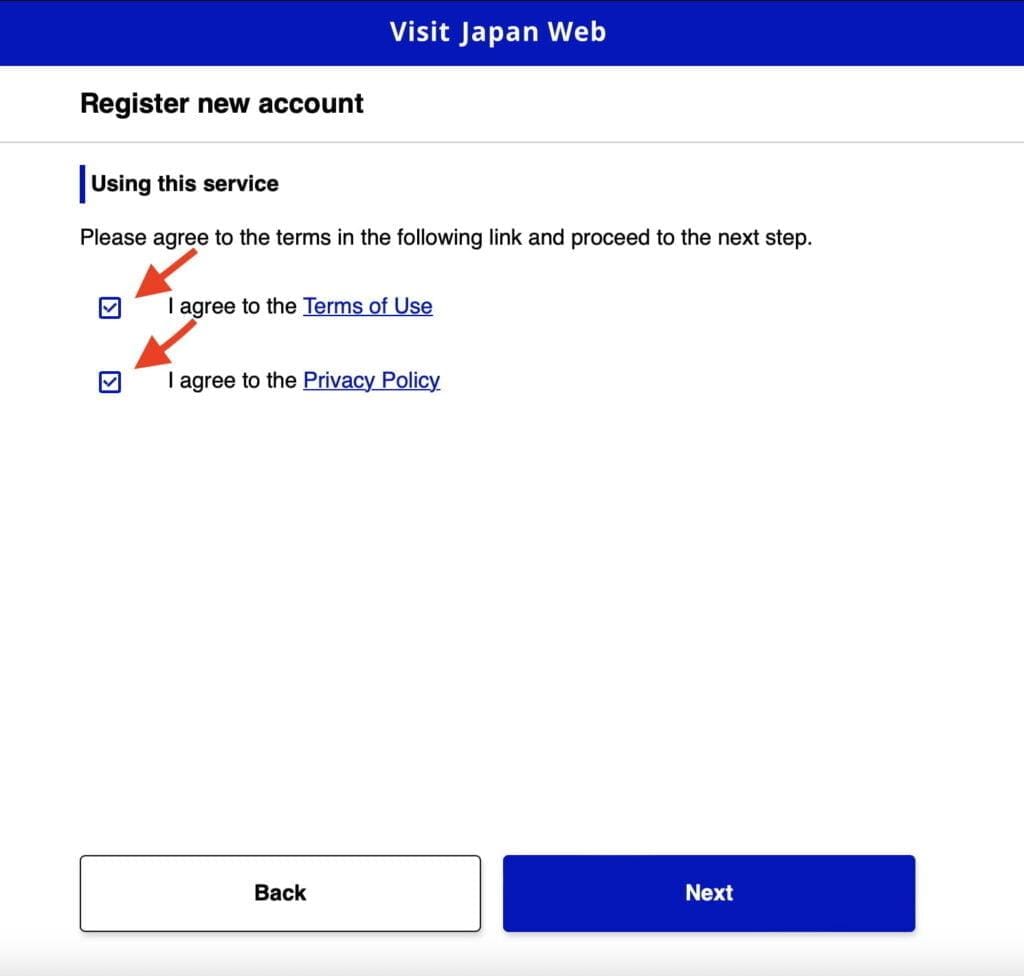
Step 5 – Tick the boxes for the Terms of Use and Privacy Policy
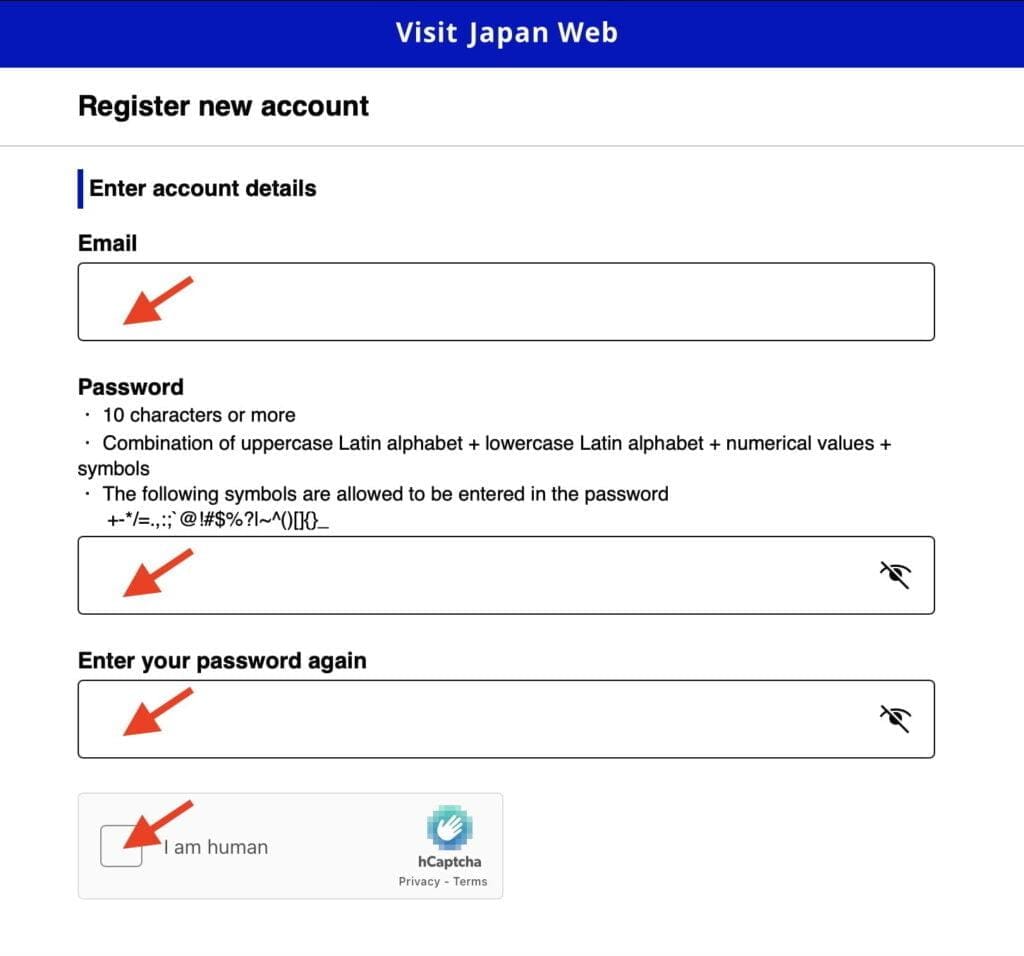
Step 6 – Enter your email and a strong password, complete any security check shown by the official service, then create your account.
Step 7 – You will receive an email containing a confirmation code. Enter the confirmation code and click “Confirm Email“.
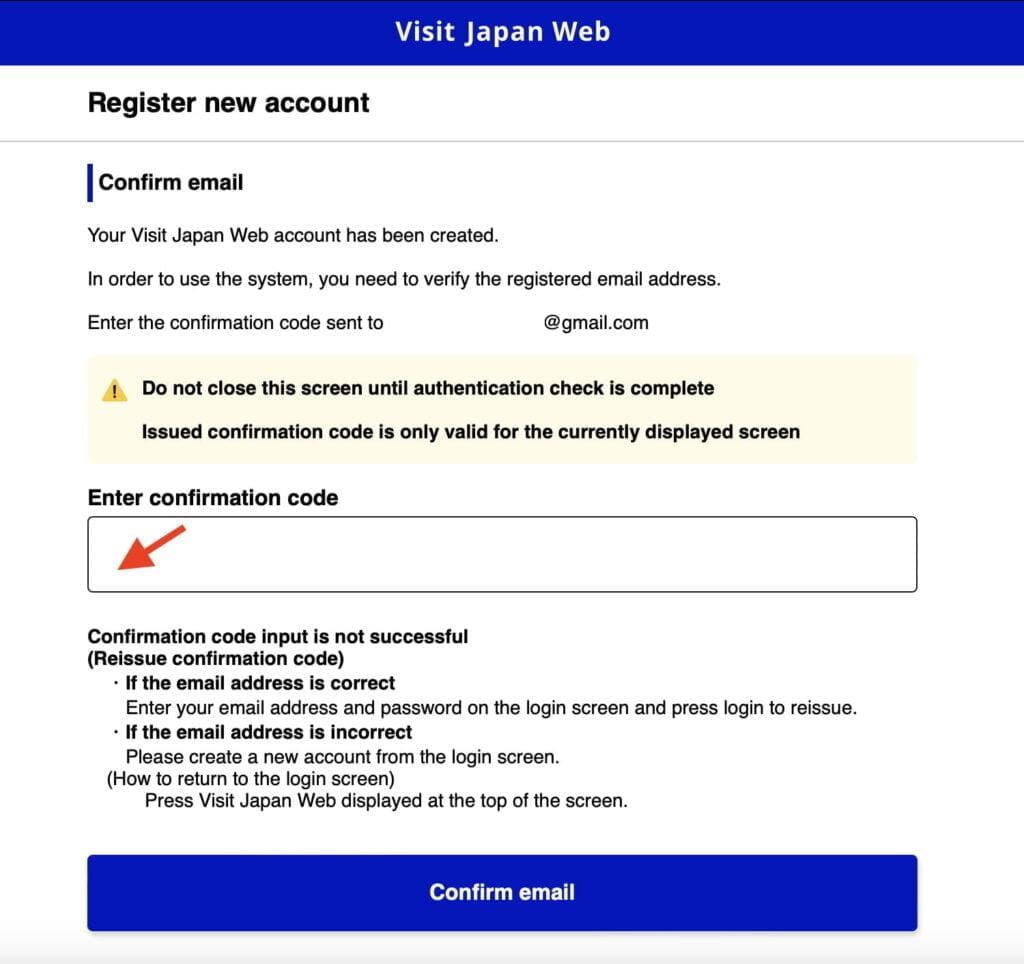
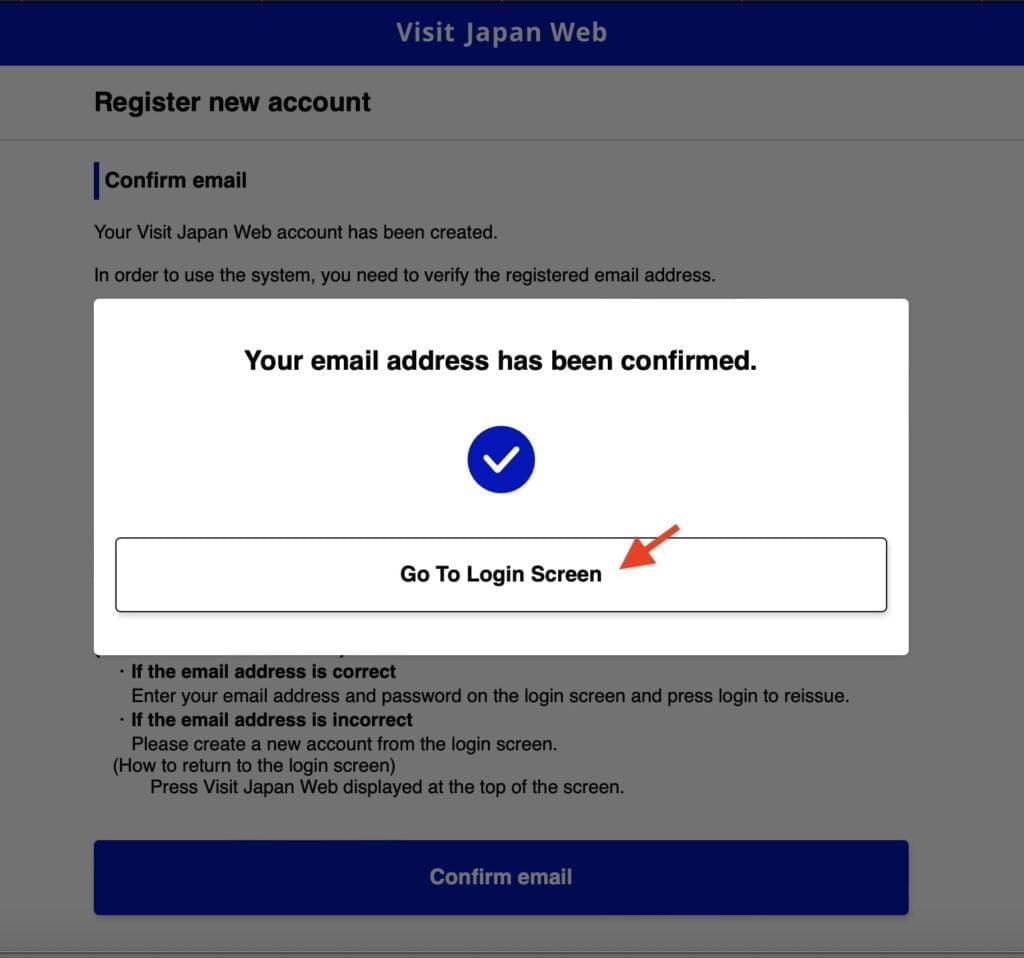
Step 8 – Click “Go To Login Screen” to log in using your account credentials.
Registering Your Traveller Details
Note: A phone is useful if you want to scan your passport, but a camera scan is not mandatory for arrival registration. The official service also offers Enter by yourself for manual passport entry.
Step 1 – Log in through the official Visit Japan Web page.
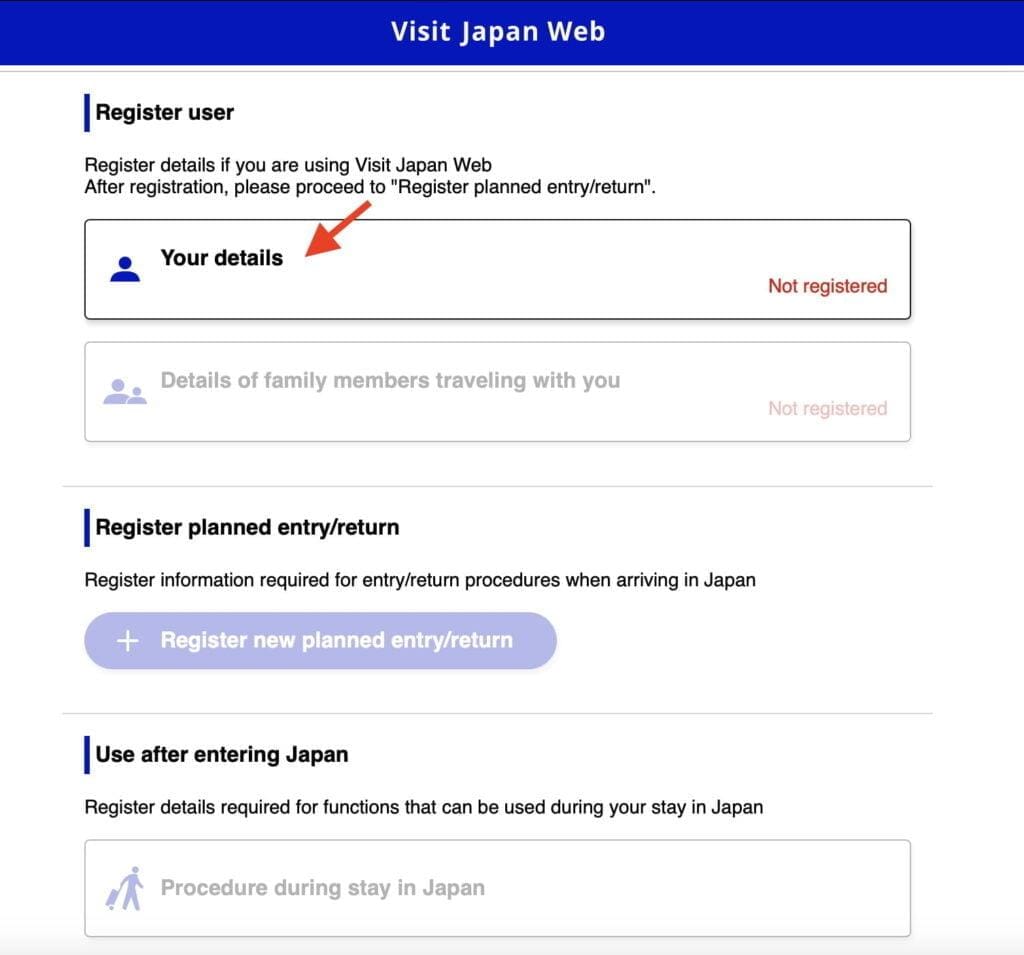
Step 2 – Click “Your Details” to start entering your passport details.
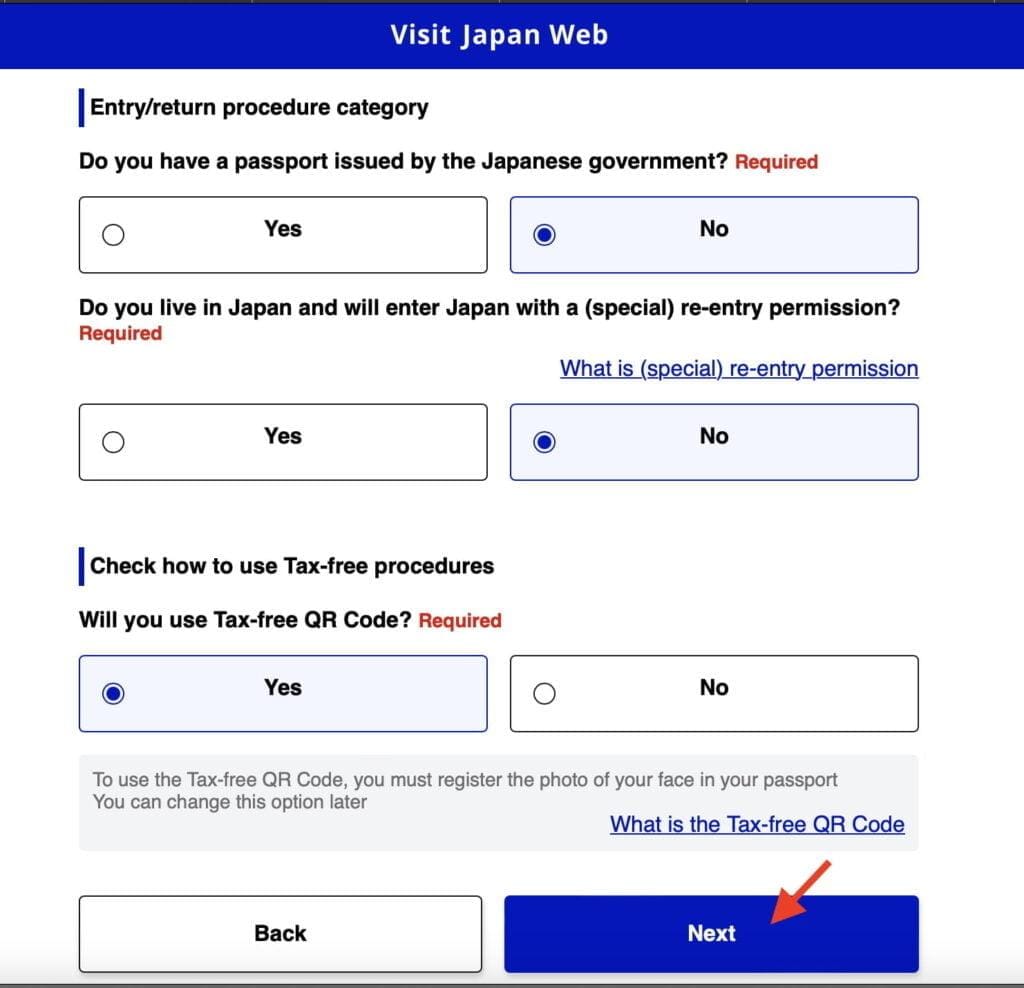
Step 3 – Answer the questions and click “Next“
Step 4 – Choose to scan your passport with the camera or enter the details yourself. Only allow camera access if you want to scan and you are on the official service.
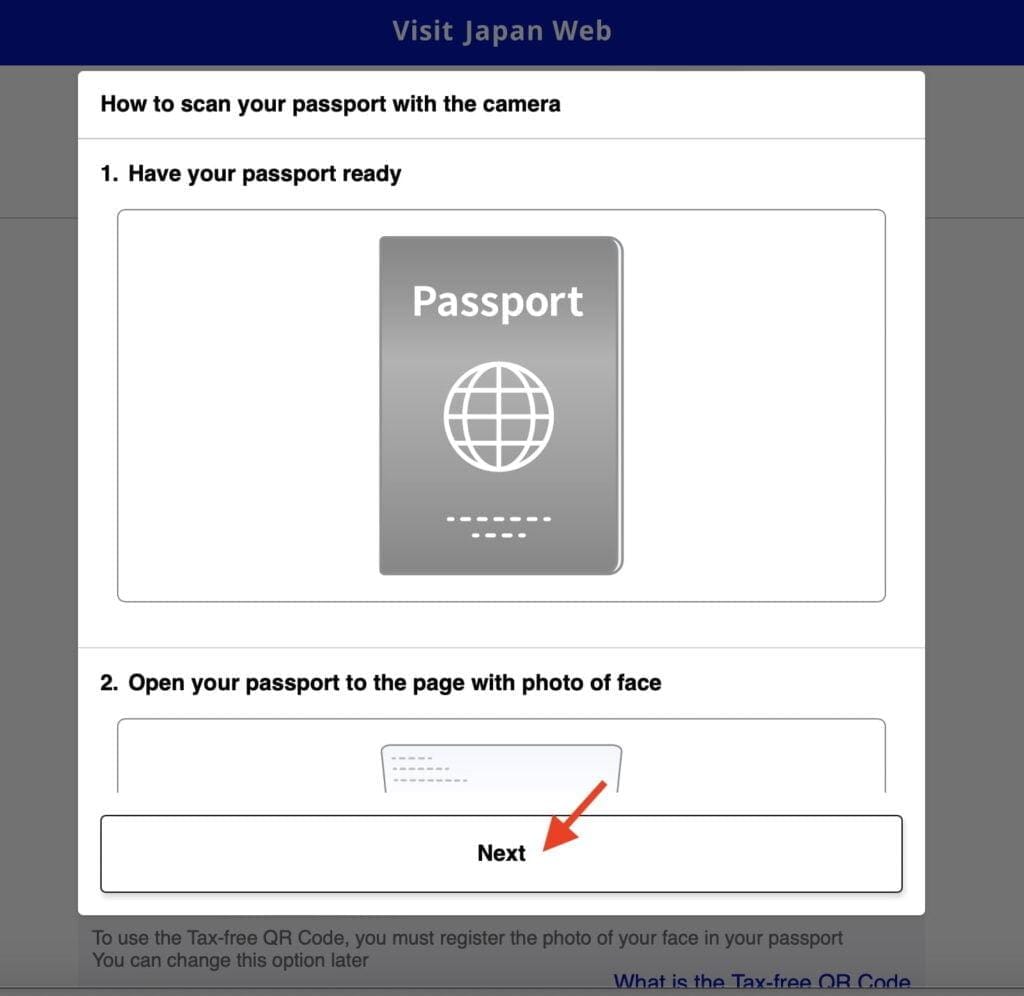
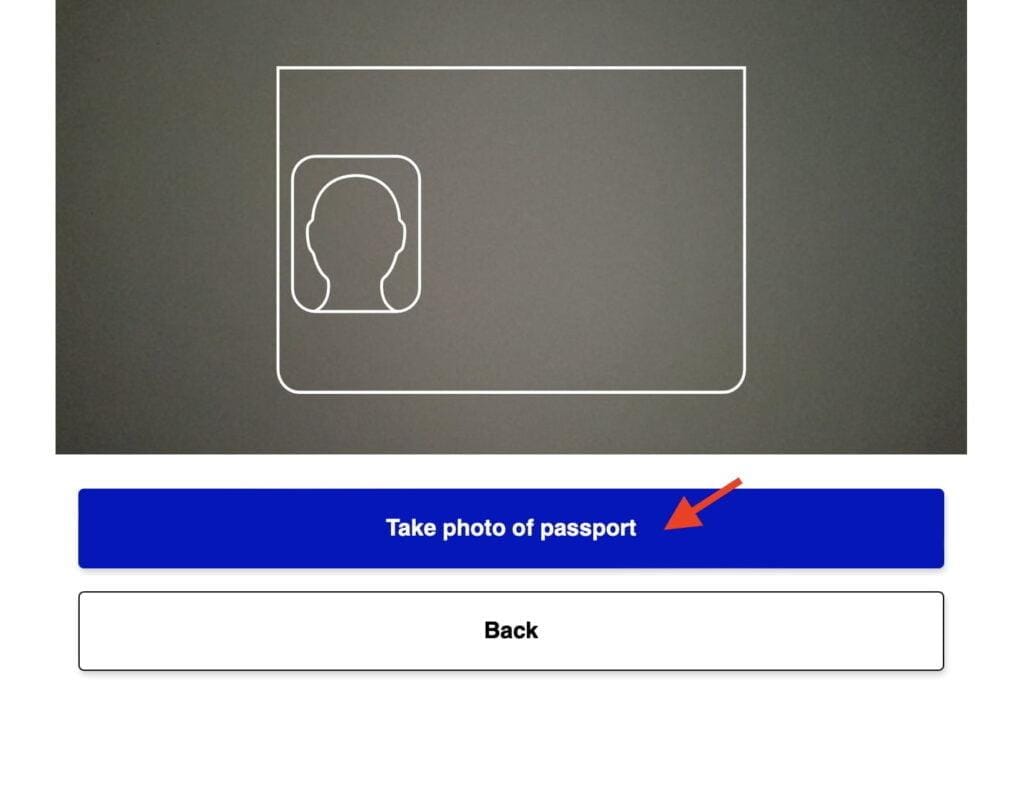
Step 5 – If scanning, align your passport within the frame and take the photograph as prompted. If scanning fails, return to the registration-method selection and choose manual entry.
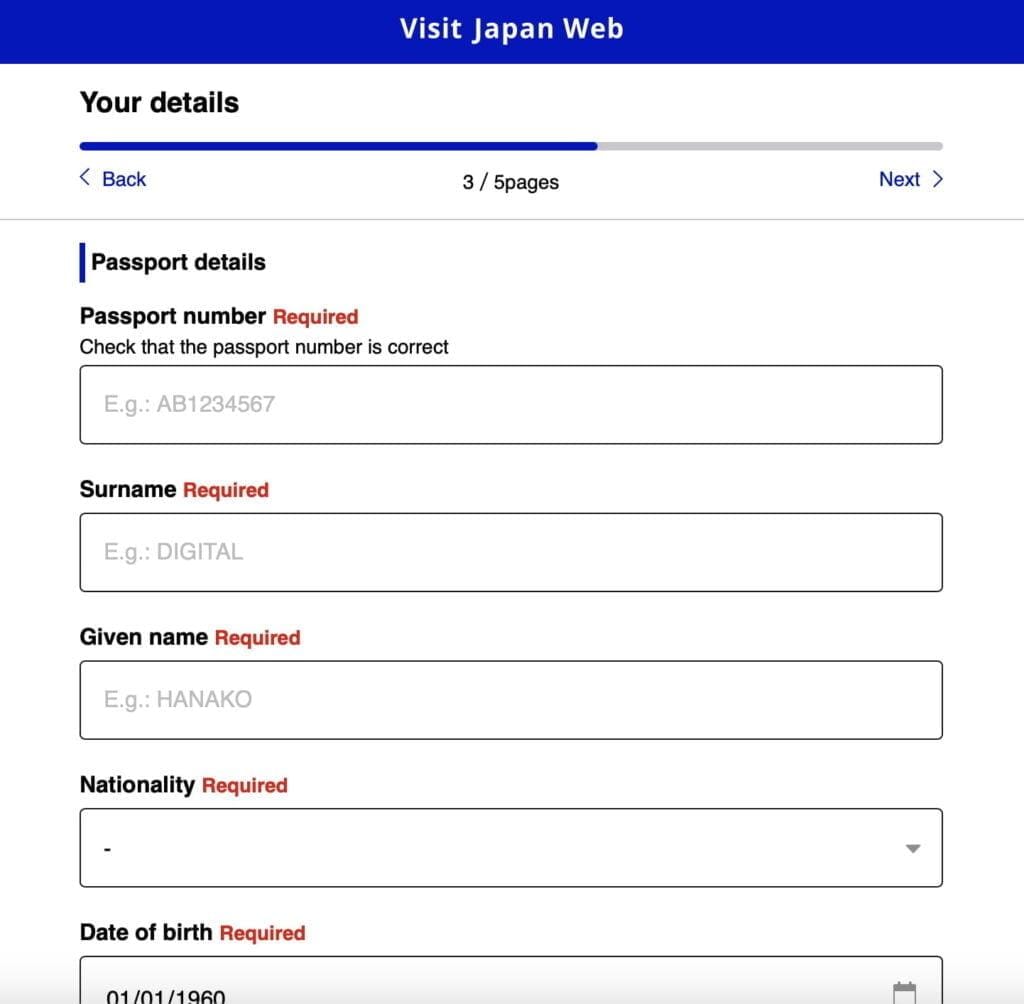
Step 6 – Carefully review your passport details, whether scanned or typed. Correct any missing information or errors before continuing.
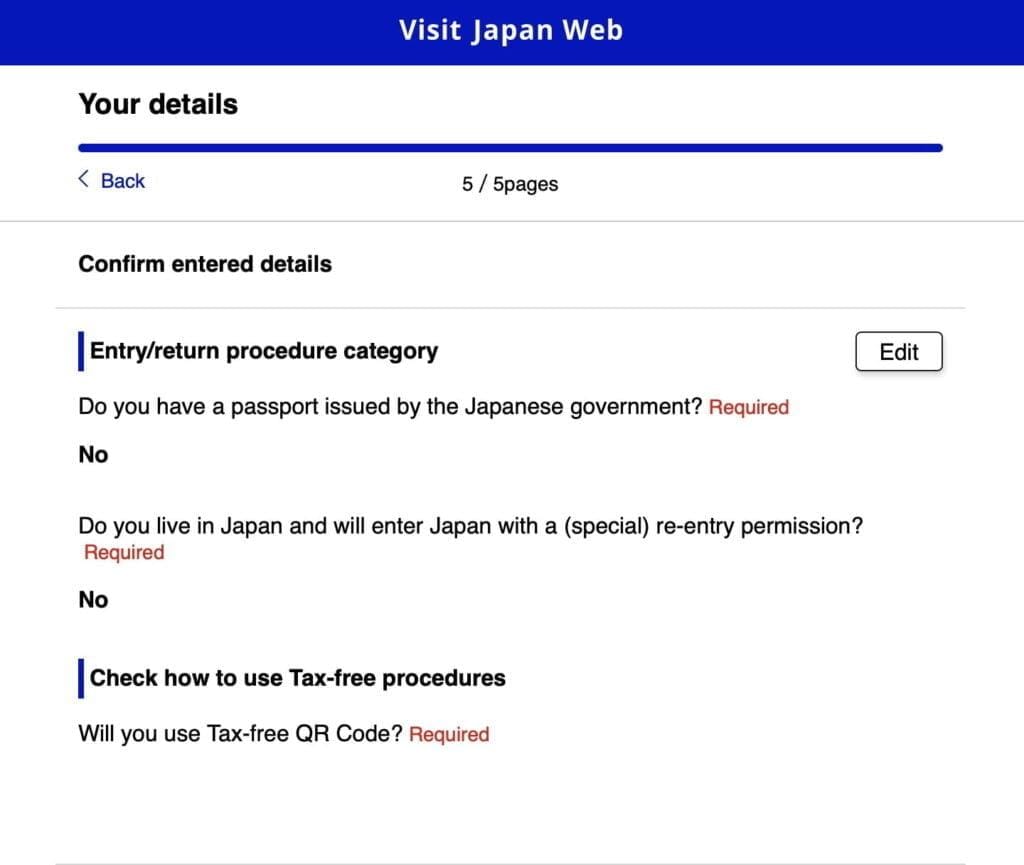
Step 7 -Review the summary to ensure that all the information you have entered is correct. If you need to make any corrections, simply click the “Edit” button. Otherwise, if everything is accurate, proceed by clicking “Register.”
Your details are now registered. If you use the accompanying-family option, enter each traveller’s information accurately and follow the service’s current guidance. Do not assume one person’s immigration details or QR code covers the whole family.
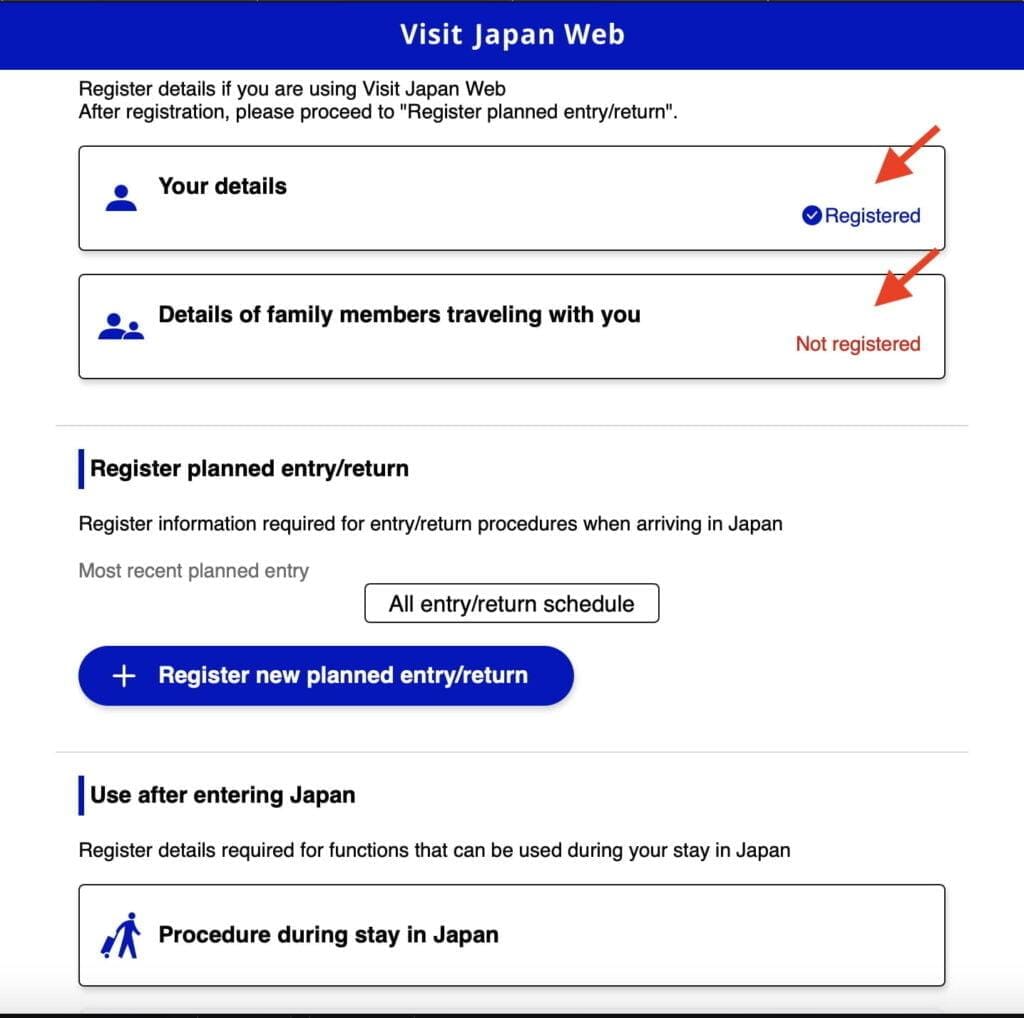
Register Your New Planned Entry
In the next section, we will guide you through the process of registering your trip to Japan.
Step 1 – Click on “Register new planned entry/return“.
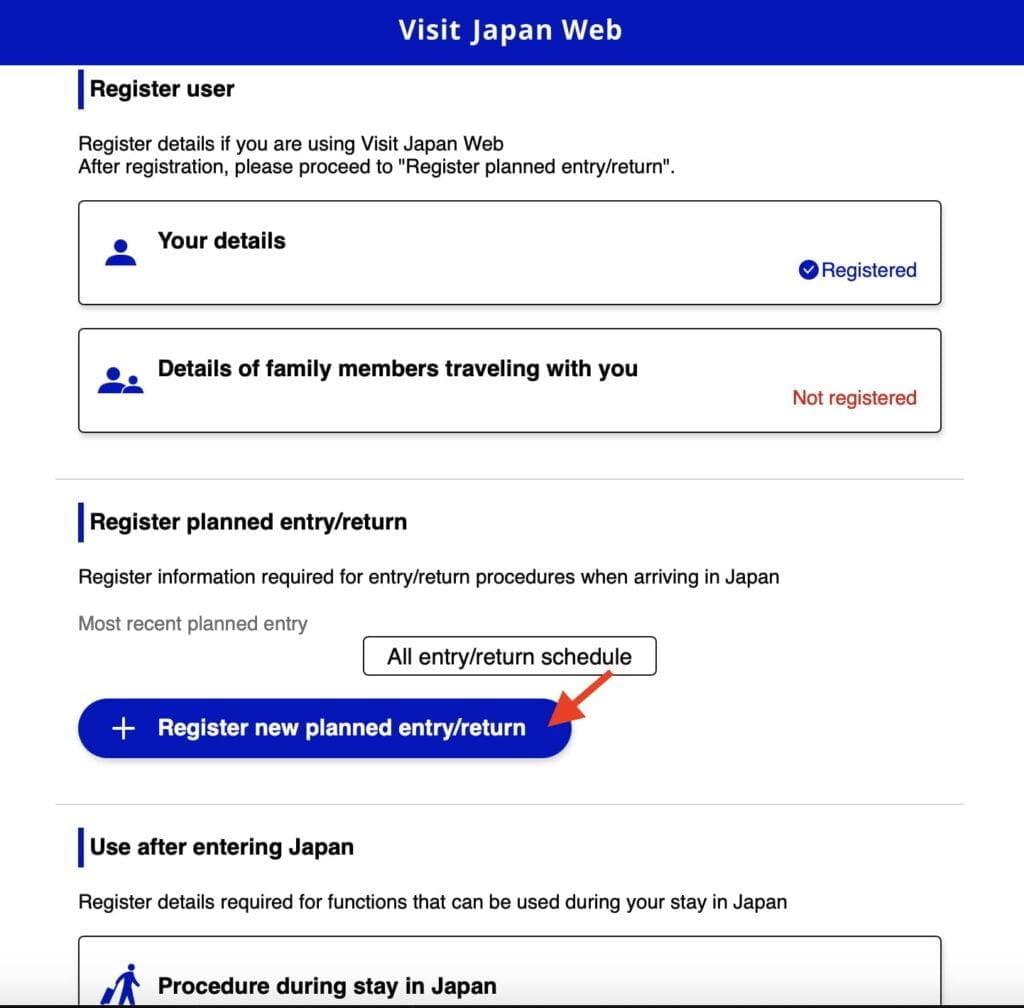
Step 2 – Click “Proceed to registration without copying details“.
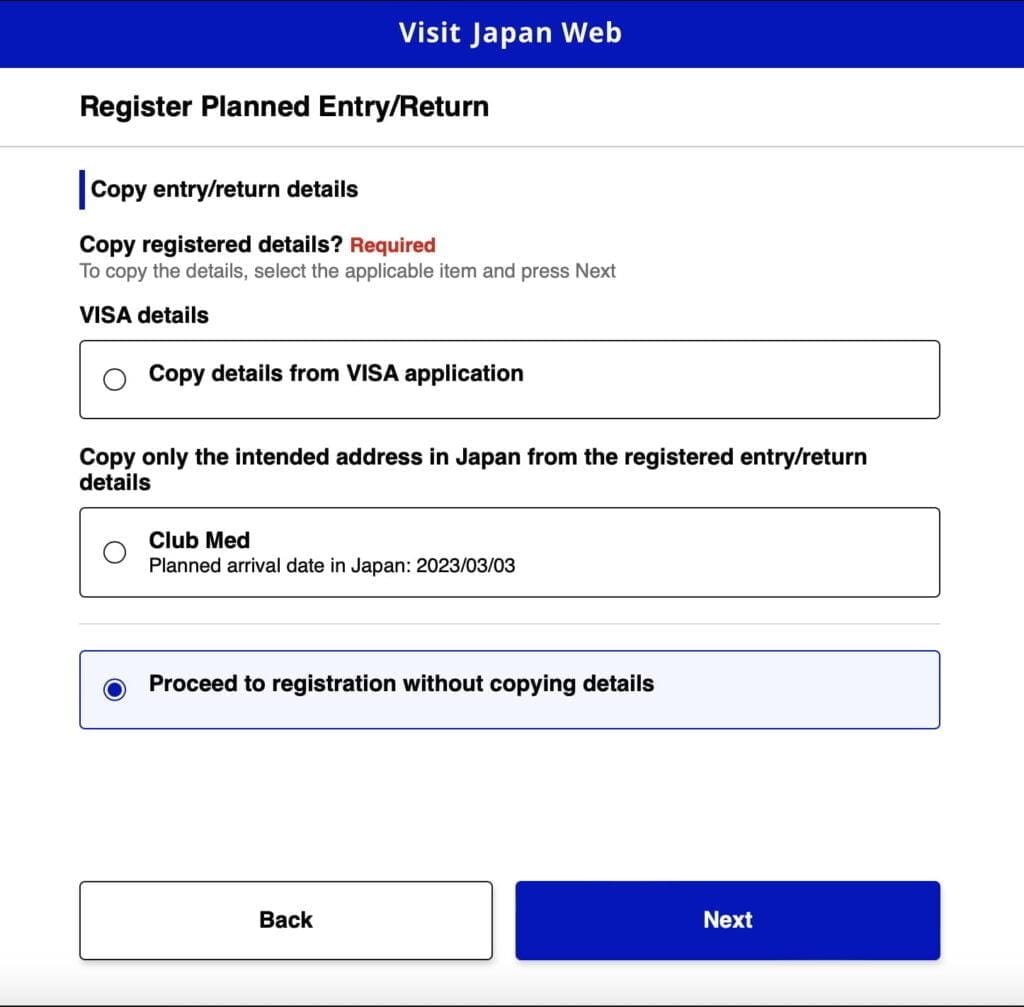
Step 3 – Enter Trip Name, Arrival Date, Airline Name and Flight Number.
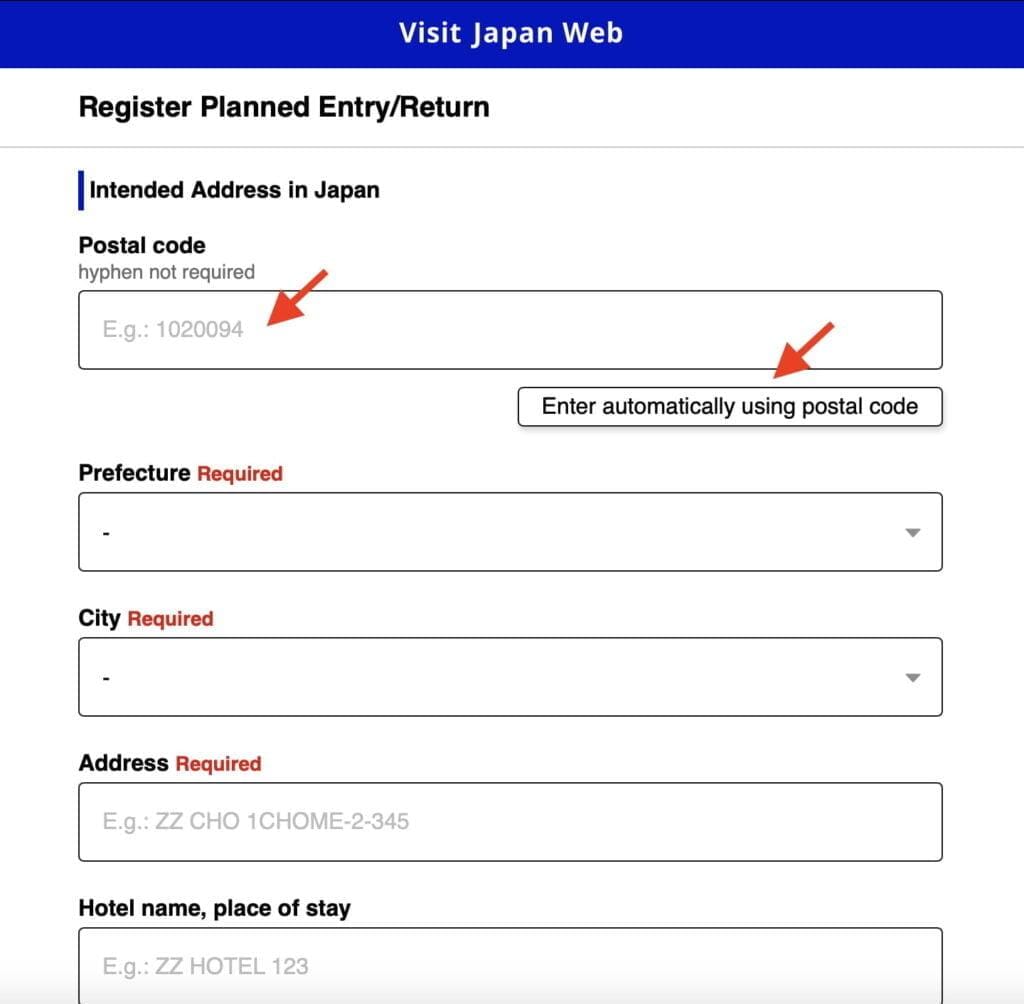
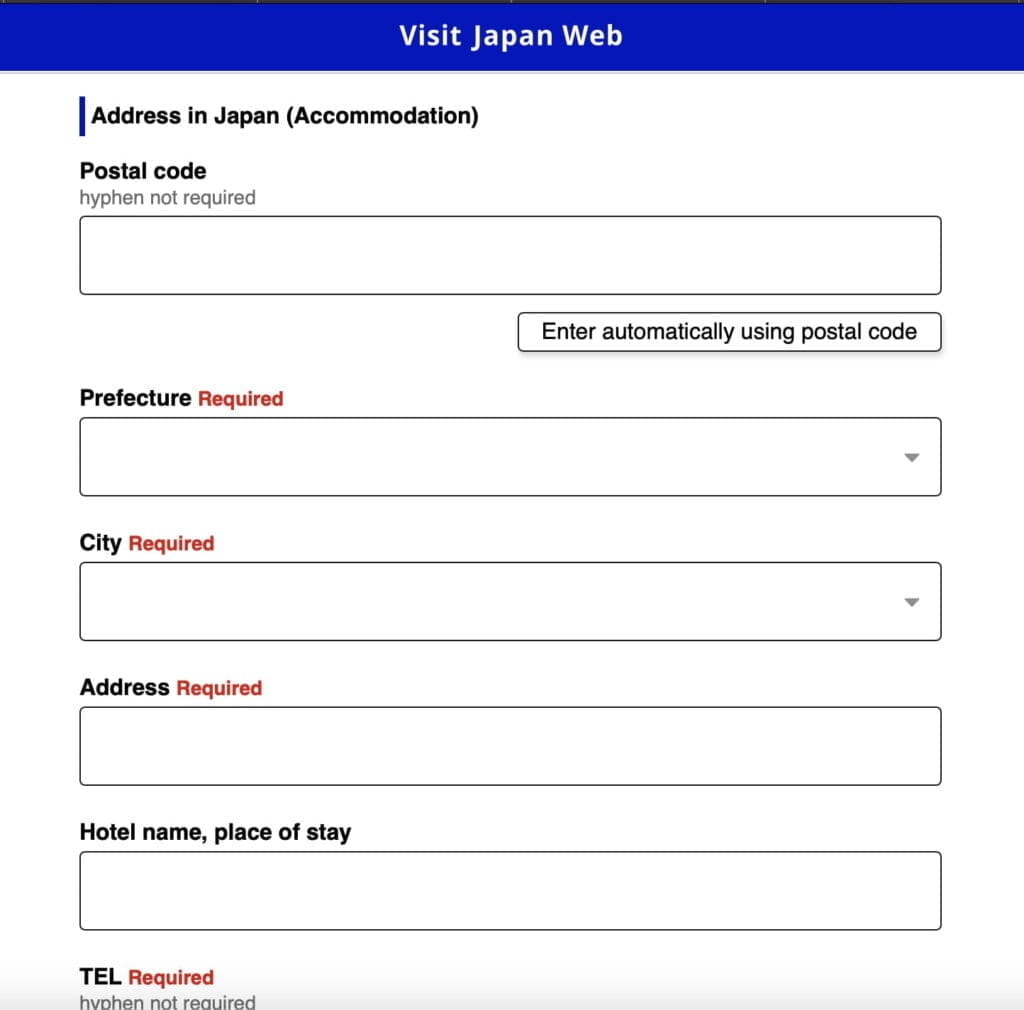
Step 4 – Enter the contact details for your actual first accommodation in Japan. A postal-code lookup may fill some address fields, but review the completed address. Use your booking confirmation rather than copying an example that may not match your stay.
Club Med Kiroro Peak – use the resort address and telephone number on your current booking confirmation.
Club Med Kiroro Grand – use the resort address and telephone number on your current booking confirmation.
Club Med Tomamu – use the resort address and telephone number on your current booking confirmation.
Club Med Sahoro – use the resort address and telephone number on your current booking confirmation.
Check your accommodation address and phone number, then confirm the entered details. If you stay in a city hotel before going to Club Med, use that first accommodation instead.
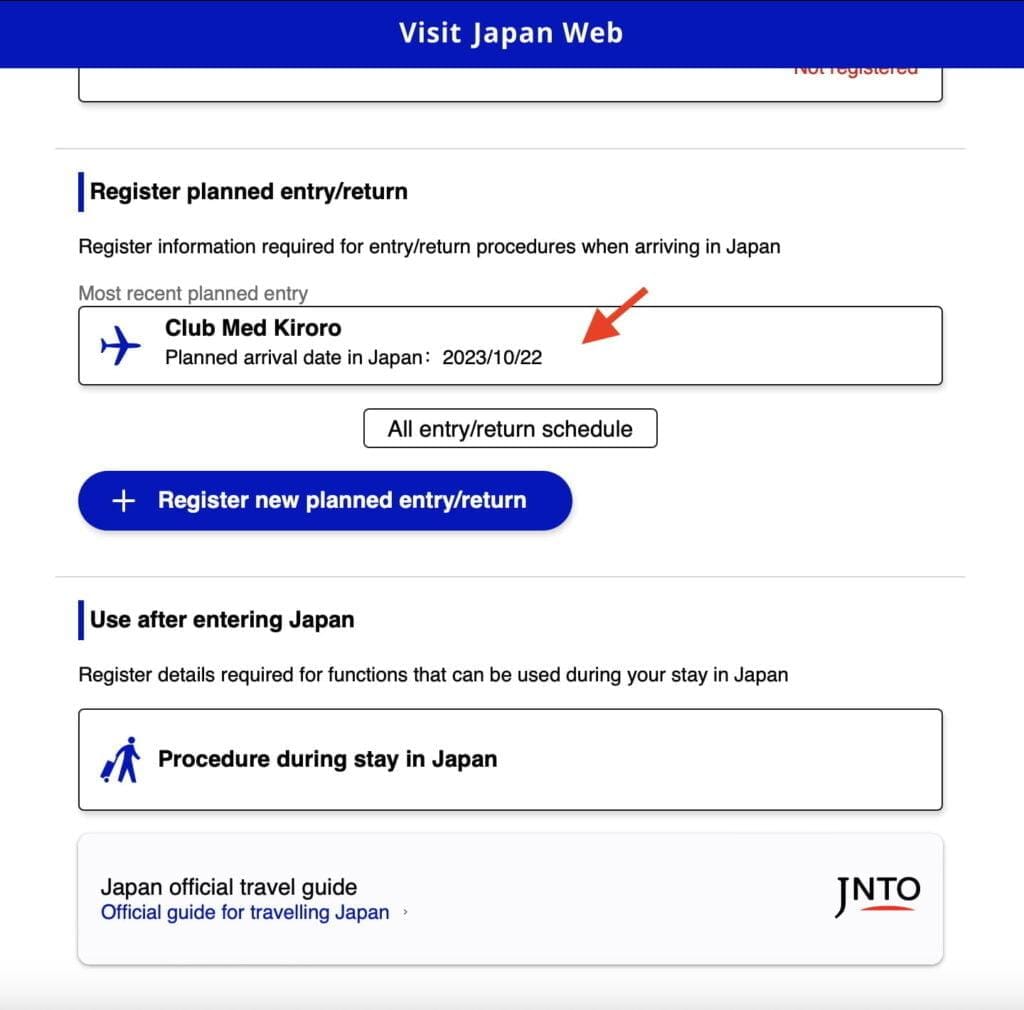
Step 5 – Once your trip is registered, open the trip name to continue with its entry procedures.
Complete the Combined Immigration and Customs Form
Step 6 – Select Immigration clearance and customs declaration. This combined menu replaces the separate foreigner disembarkation-card and customs menus shown in the historical screenshots below.
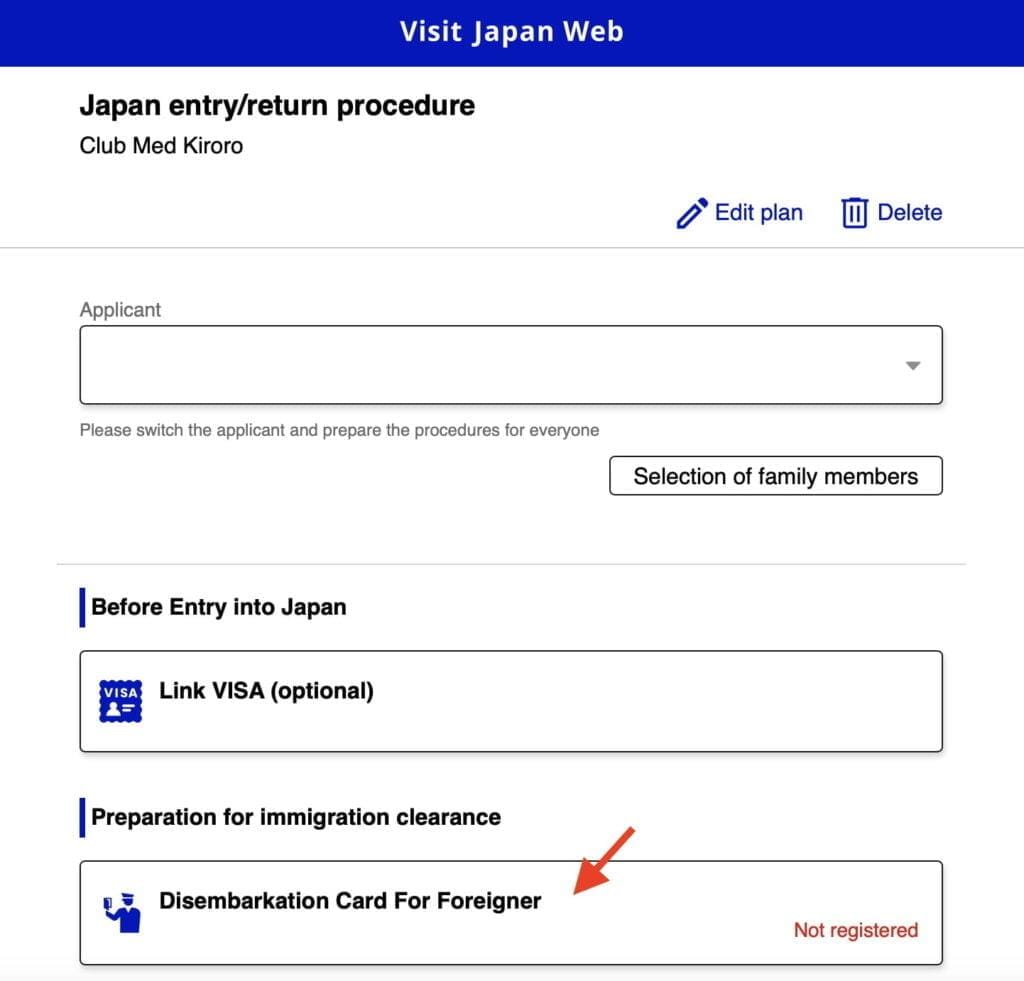
Step 7 – Work through the combined form using the live on-screen prompts. The following examples show the kinds of information to prepare, not a guaranteed current sequence of screens.
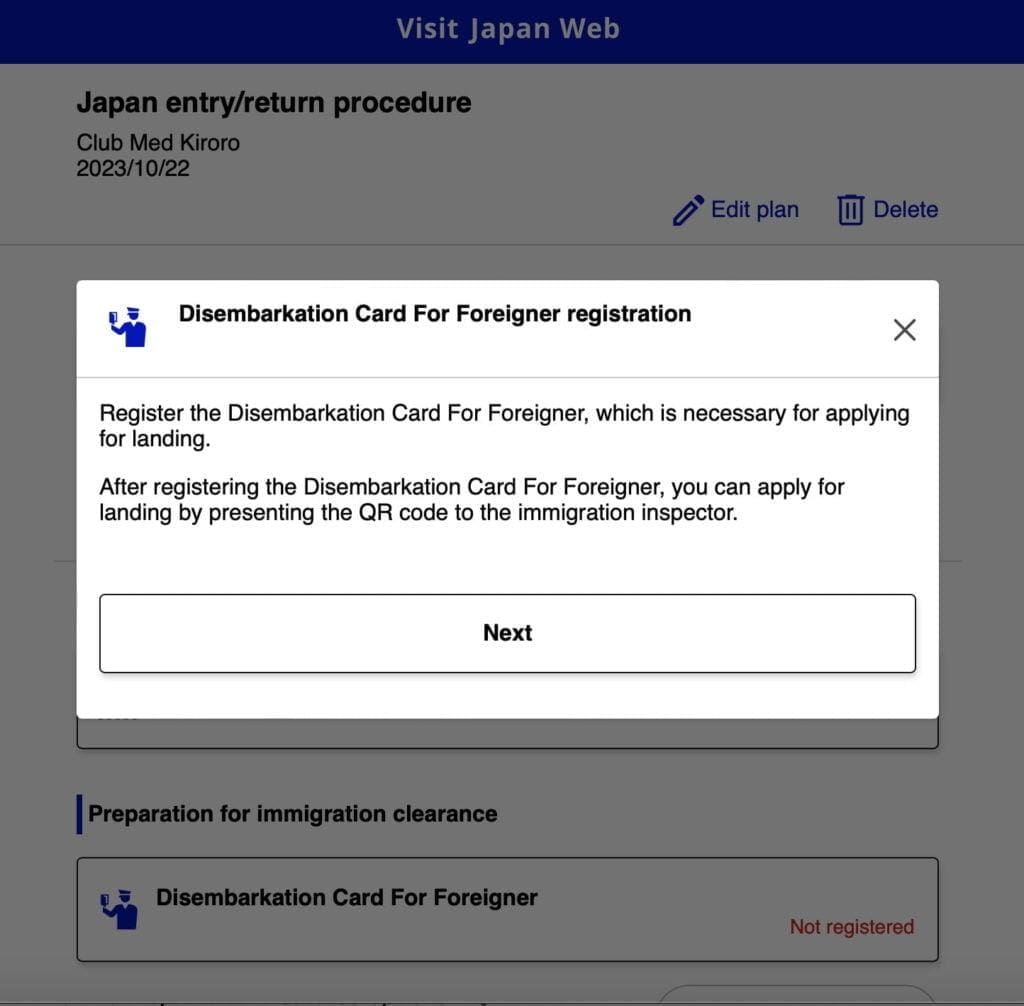
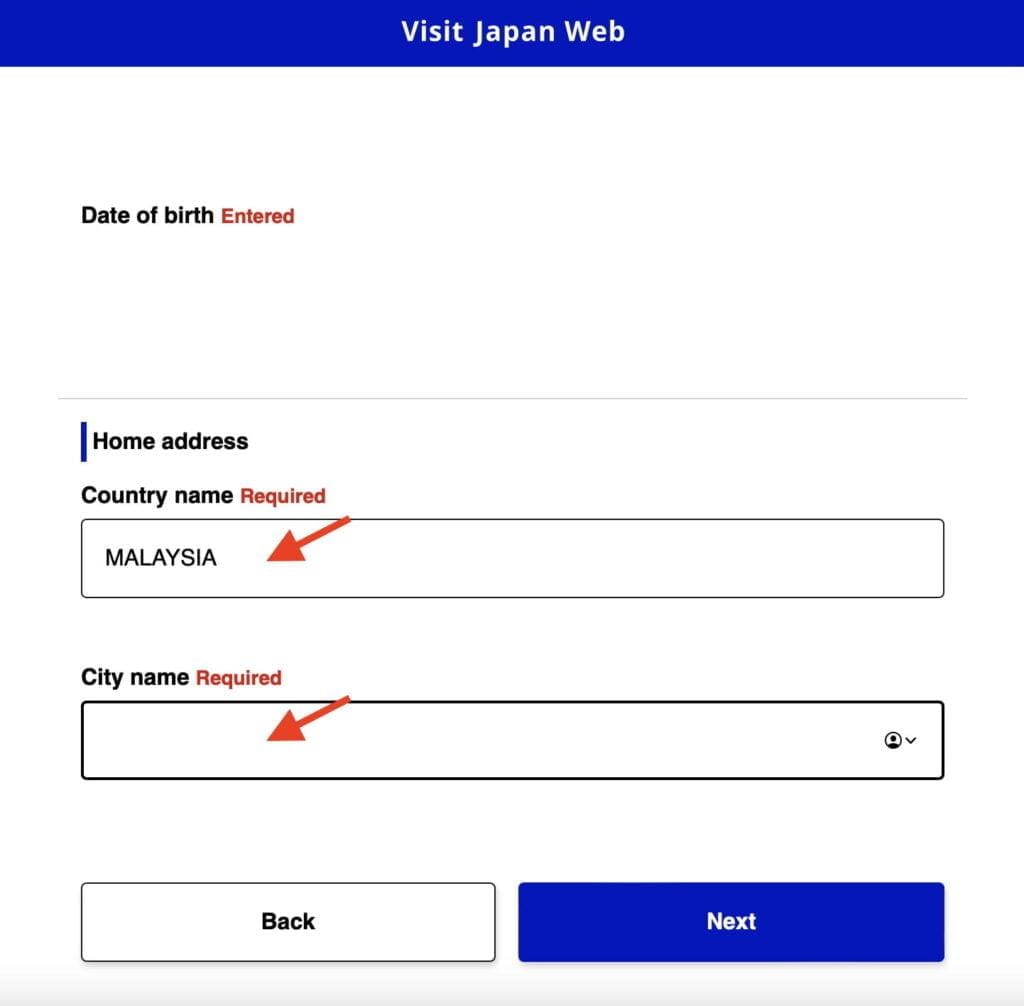
Step 8 – Enter Country Name and City Name of your home address and click “Next“.
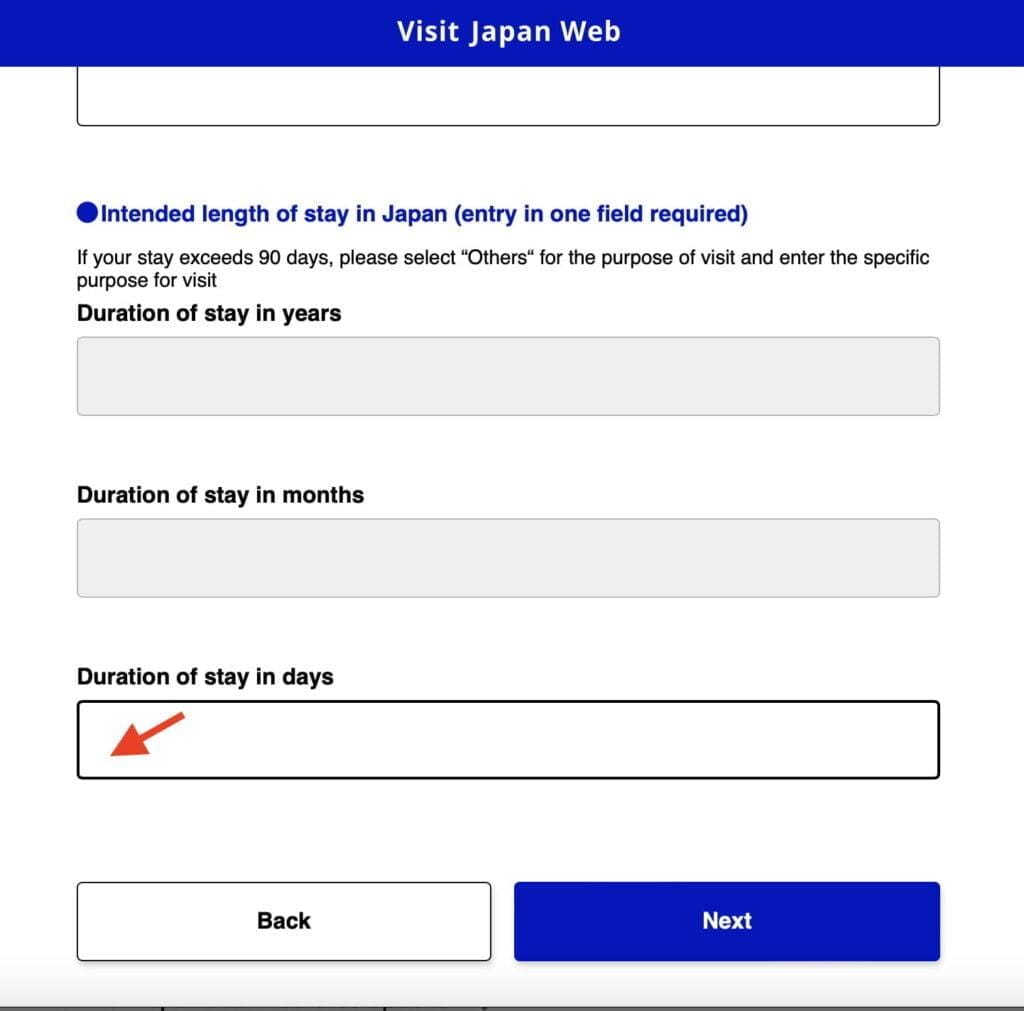
Step 9 – Enter the number of “Duration of Stay in Days” and then click “Next.”
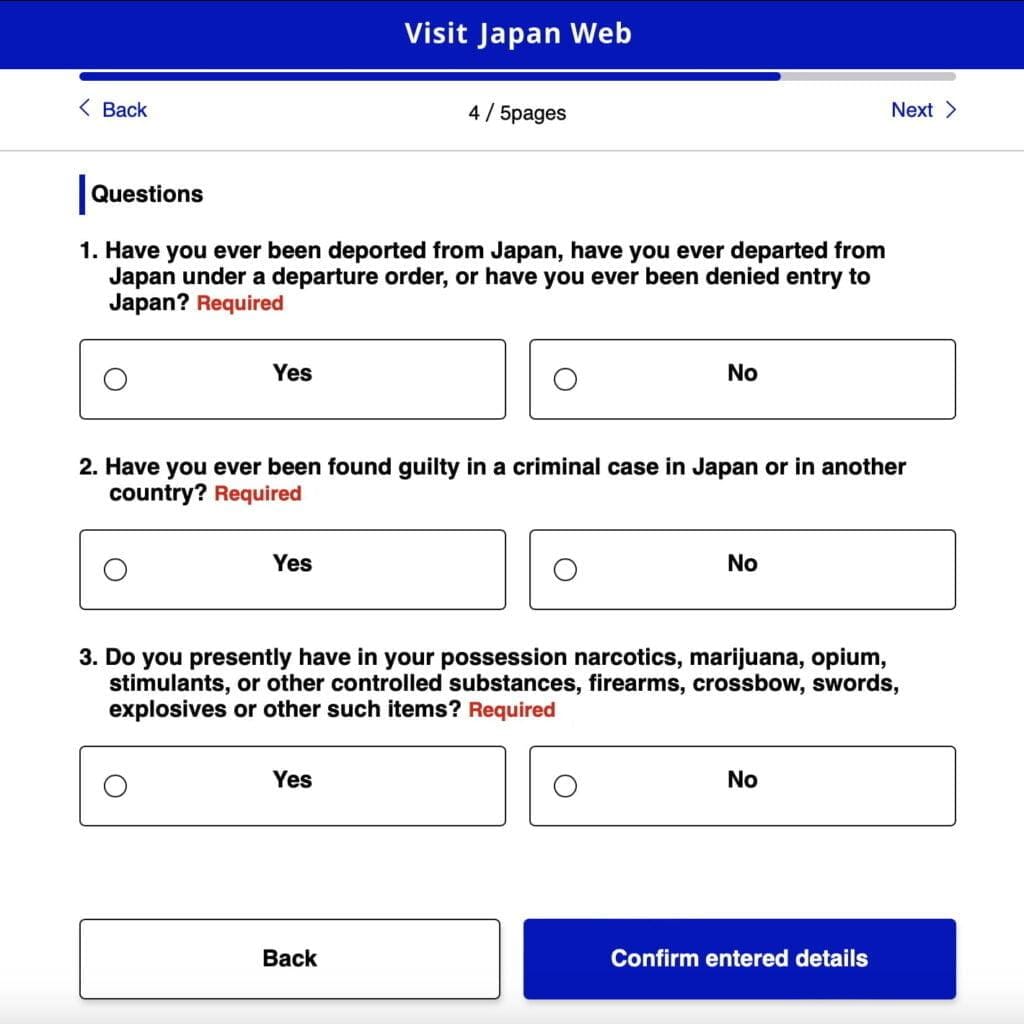
Step 10 – Answer the questionnaire and click “Confirm Entered Details“.
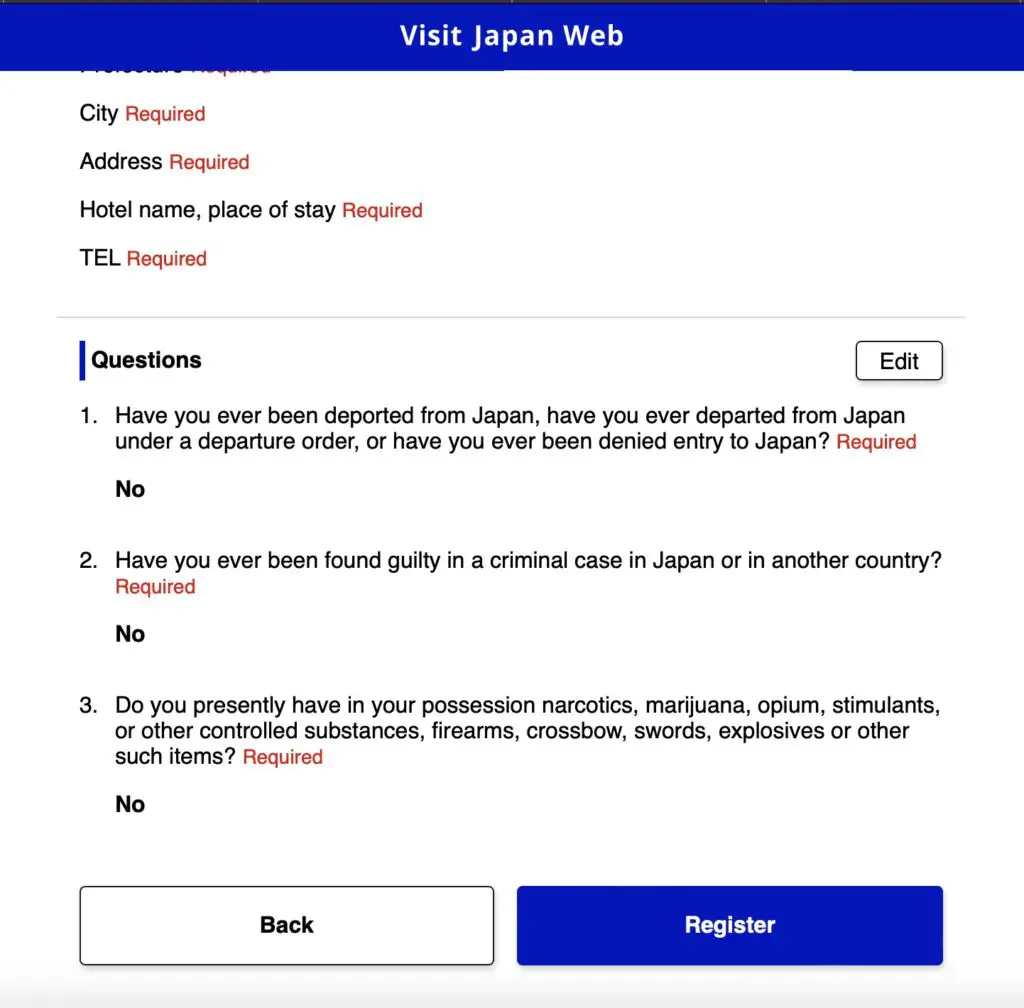
Step 11 – Review the information entered and correct any mistakes. Continue through the customs questions in the same combined process before completing registration.
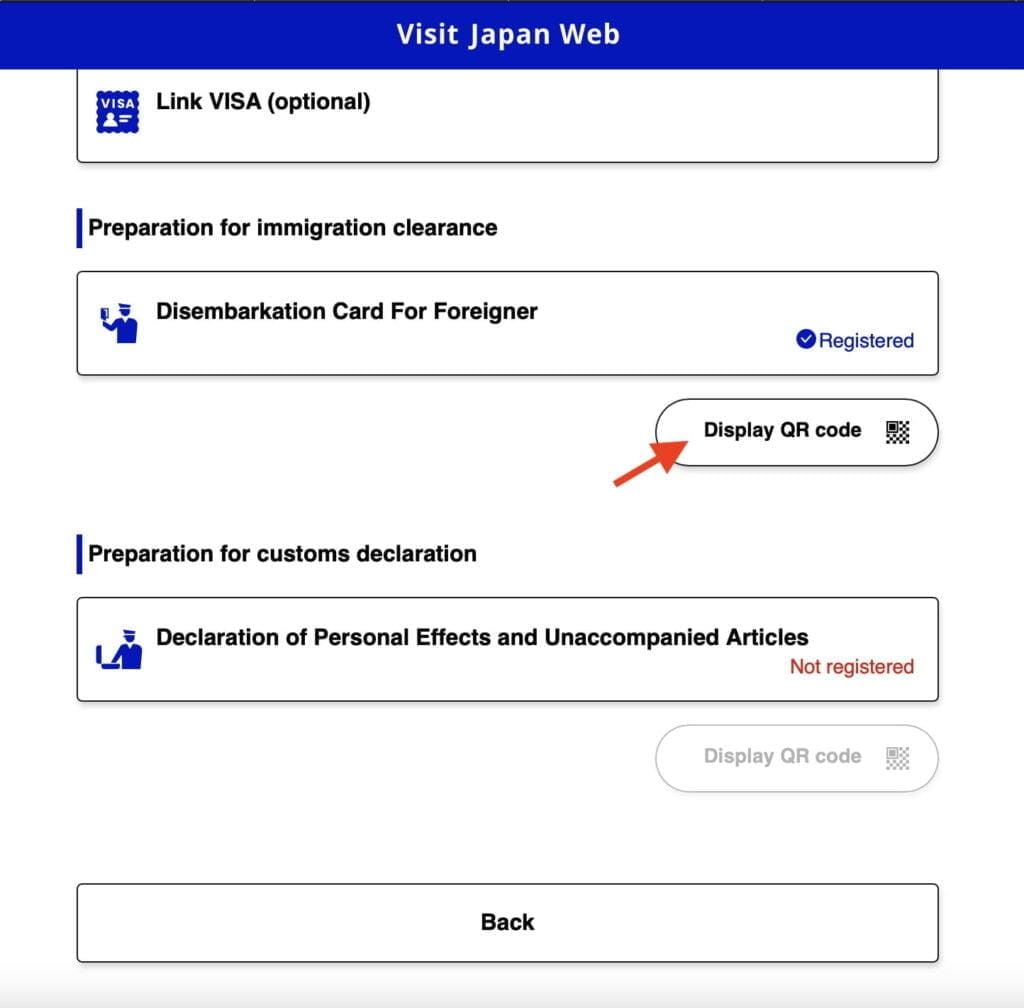
Do not stop at an old immigration-only QR screen. Complete the combined immigration and customs registration for your trip. The image below shows the former separate-code system and is not the current QR-code workflow.
Customs Questions in the Combined Form
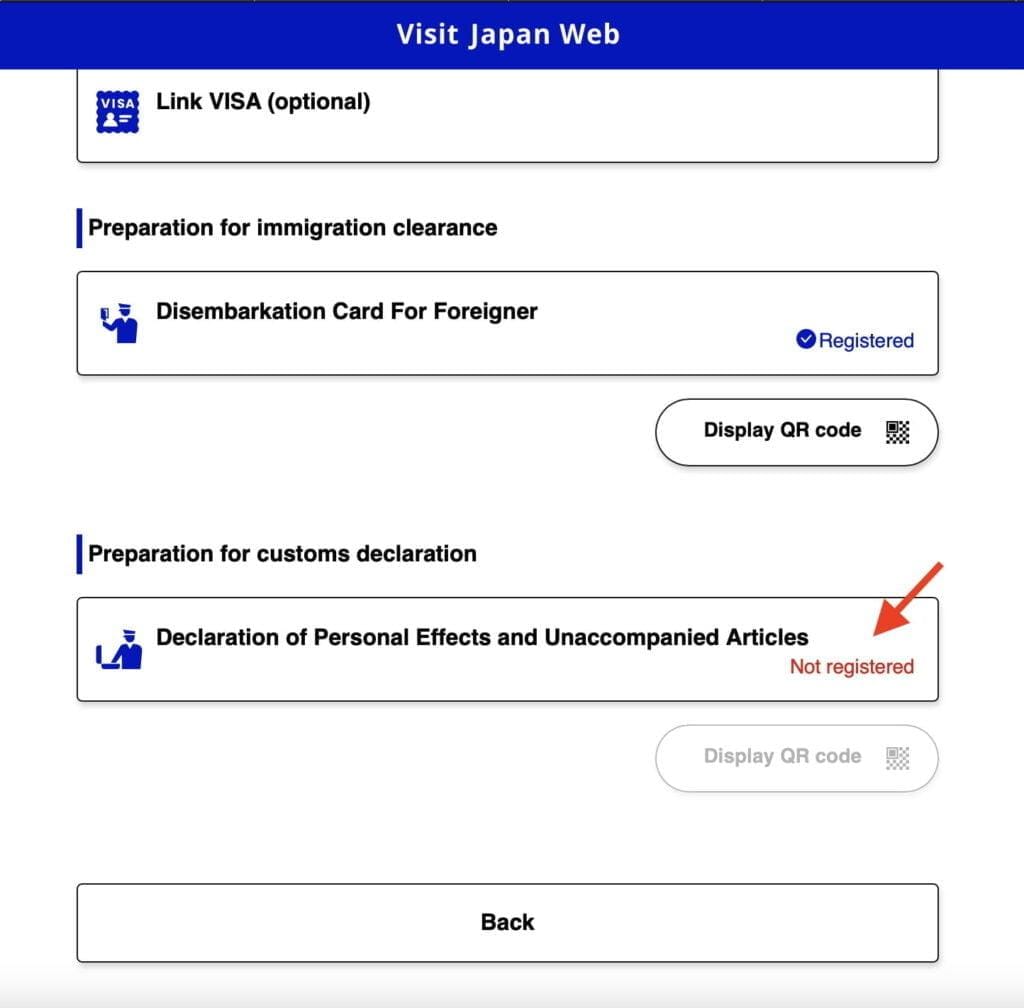
Step 1 – Continue with the customs questions within Immigration clearance and customs declaration. You no longer need to look for a separate customs registration menu as pictured below.
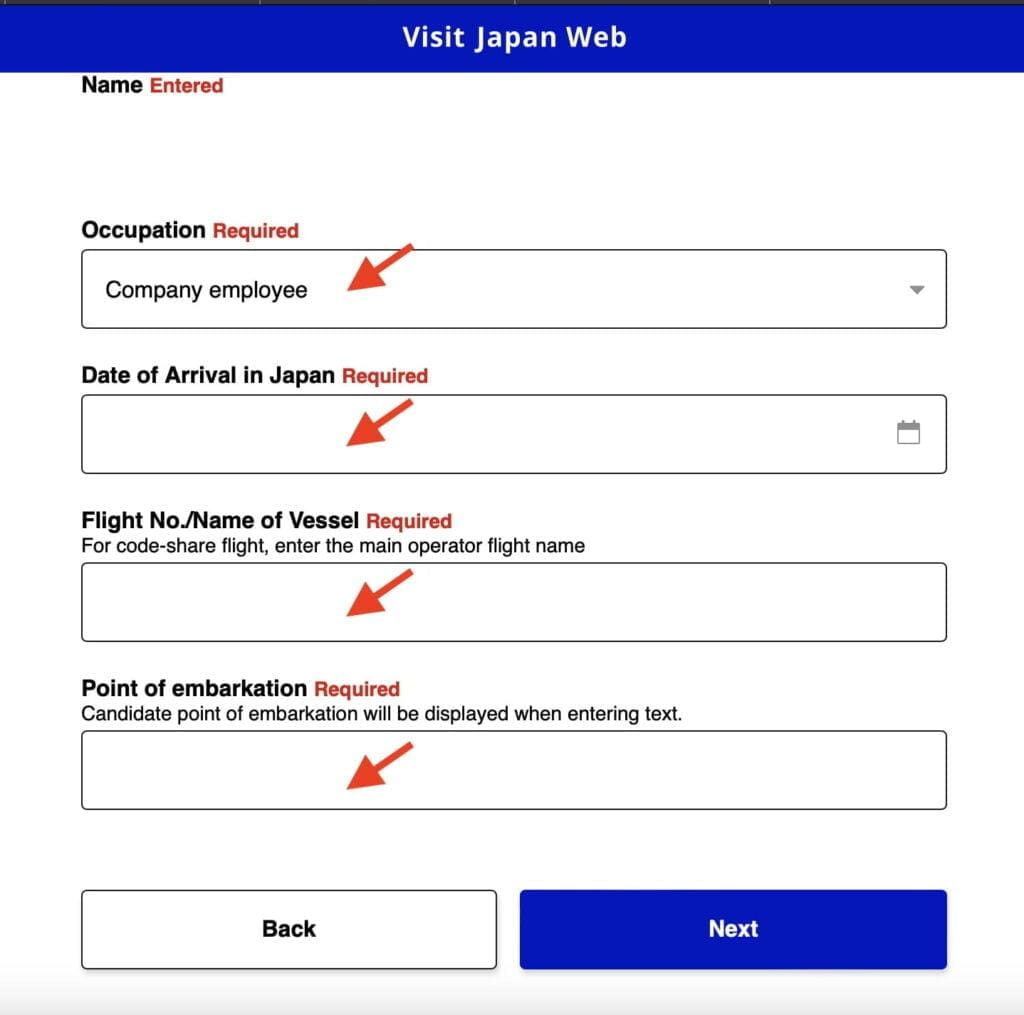
Step 2 – Complete all the required fields with the necessary information and click “Next“
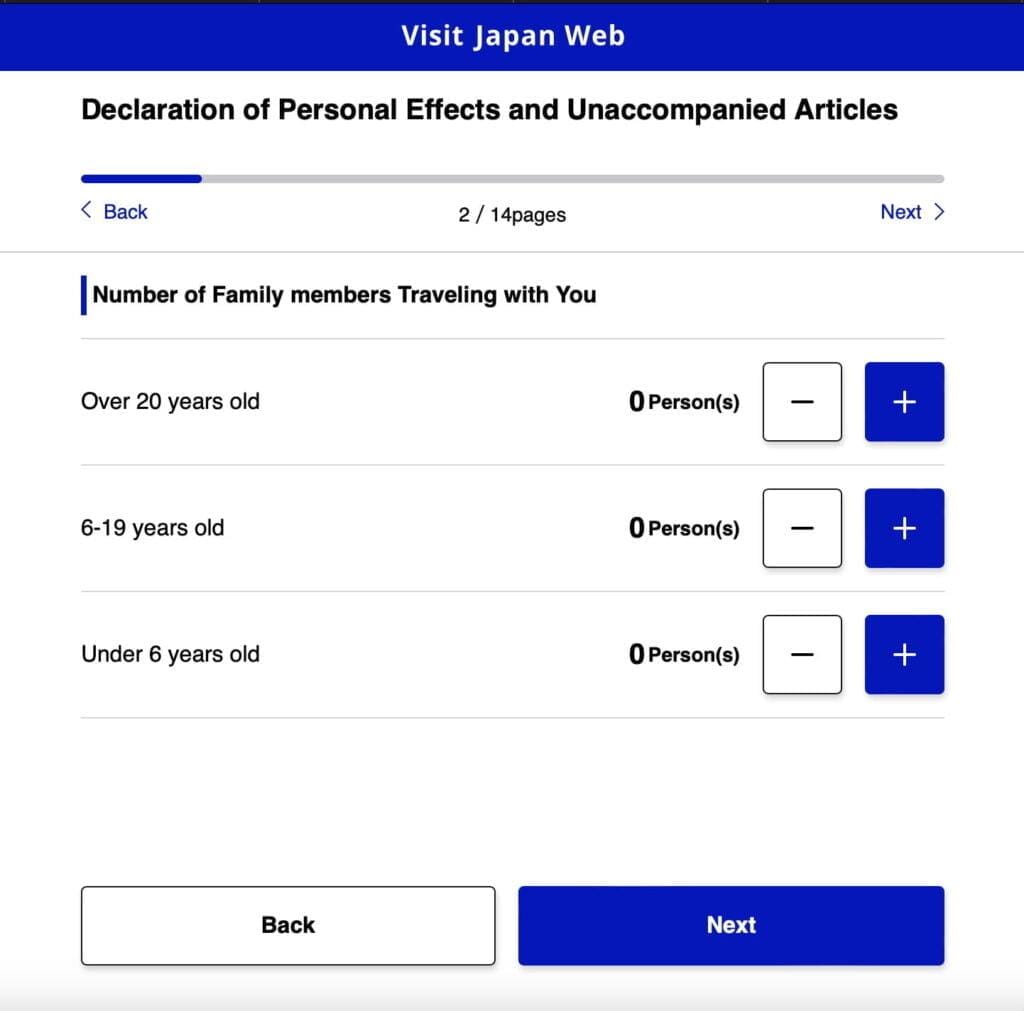
Step 3 – If you have other family members traveling with you, please indicate and click “Next” to proceed.
Step 4 – Review any prefilled accommodation information and correct it if needed. Check that it matches the trip you are registering.
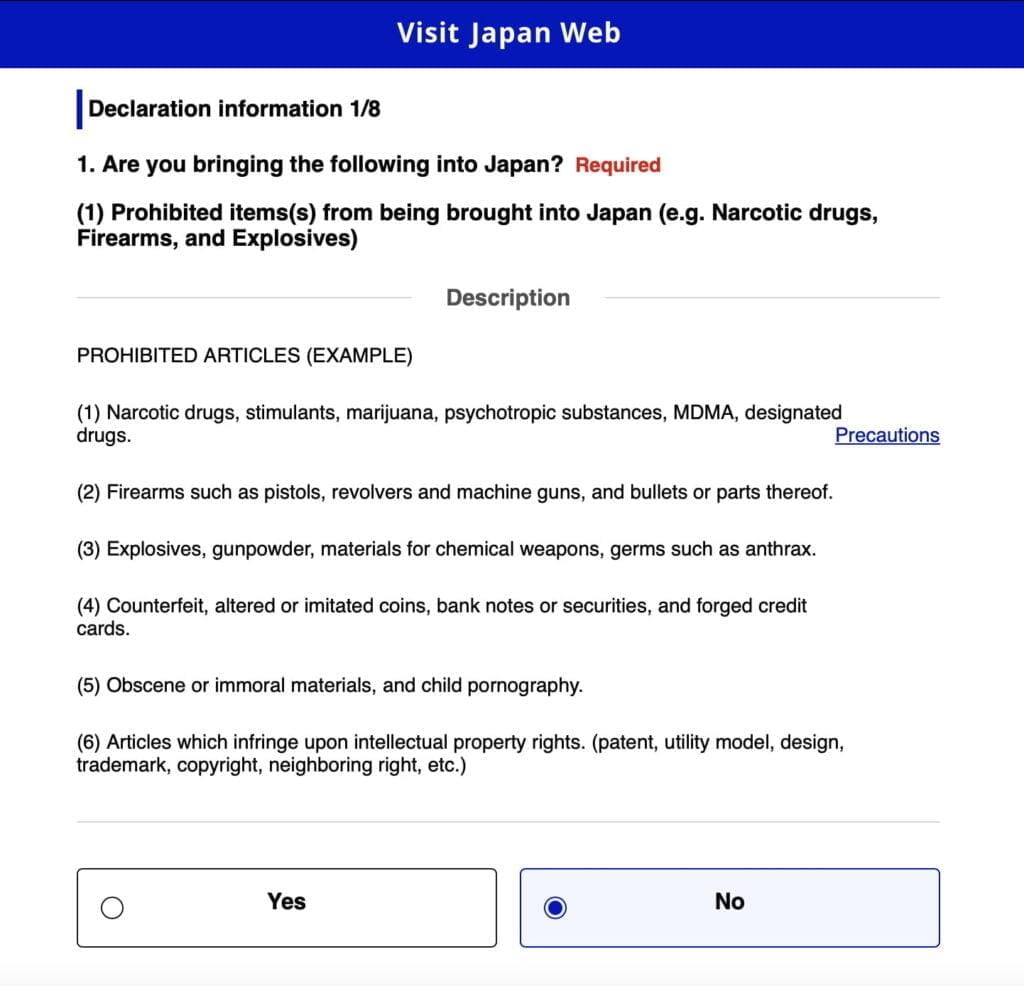
Step 5 – Answer all customs questions accurately and follow the prompts to continue. The number and order of screens may change; do not rely on the former eight-page sequence.
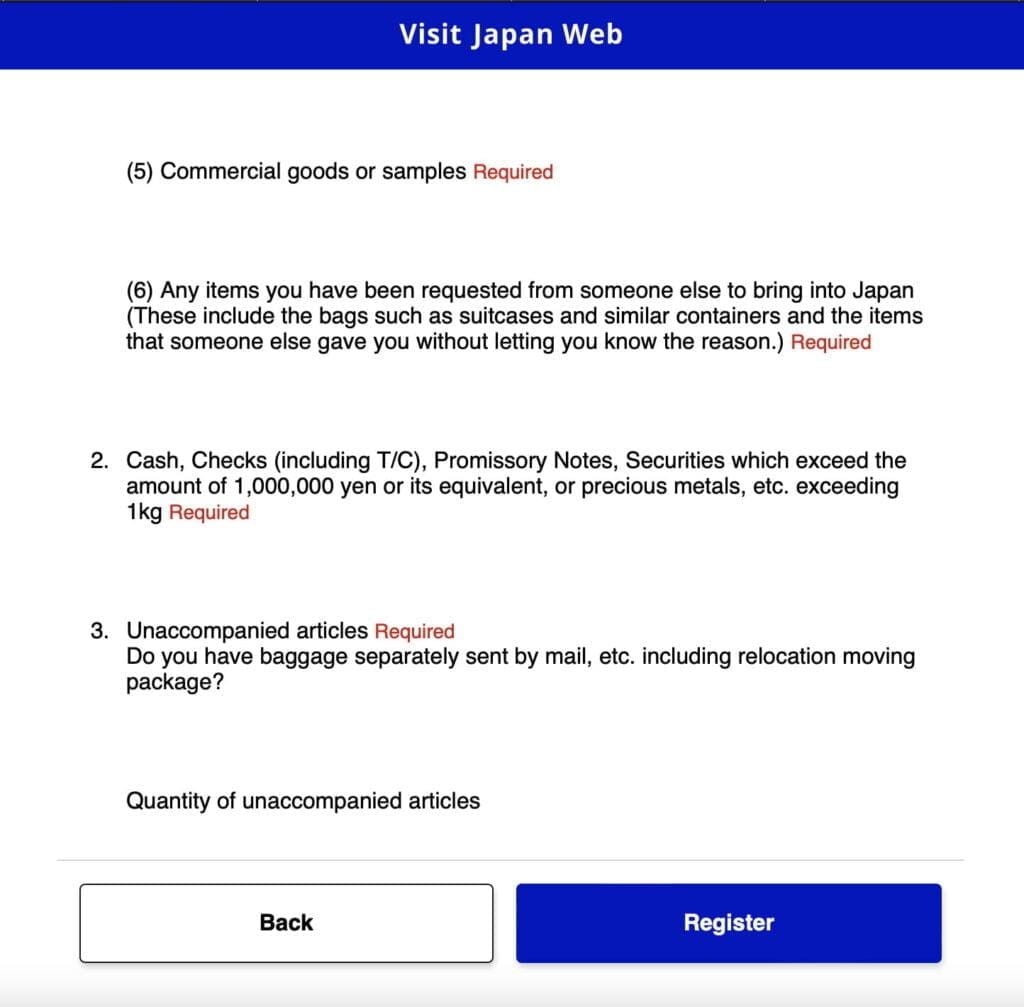
Step 6 – Review both your immigration and customs answers, make any corrections, then finish the registration following the live prompts.
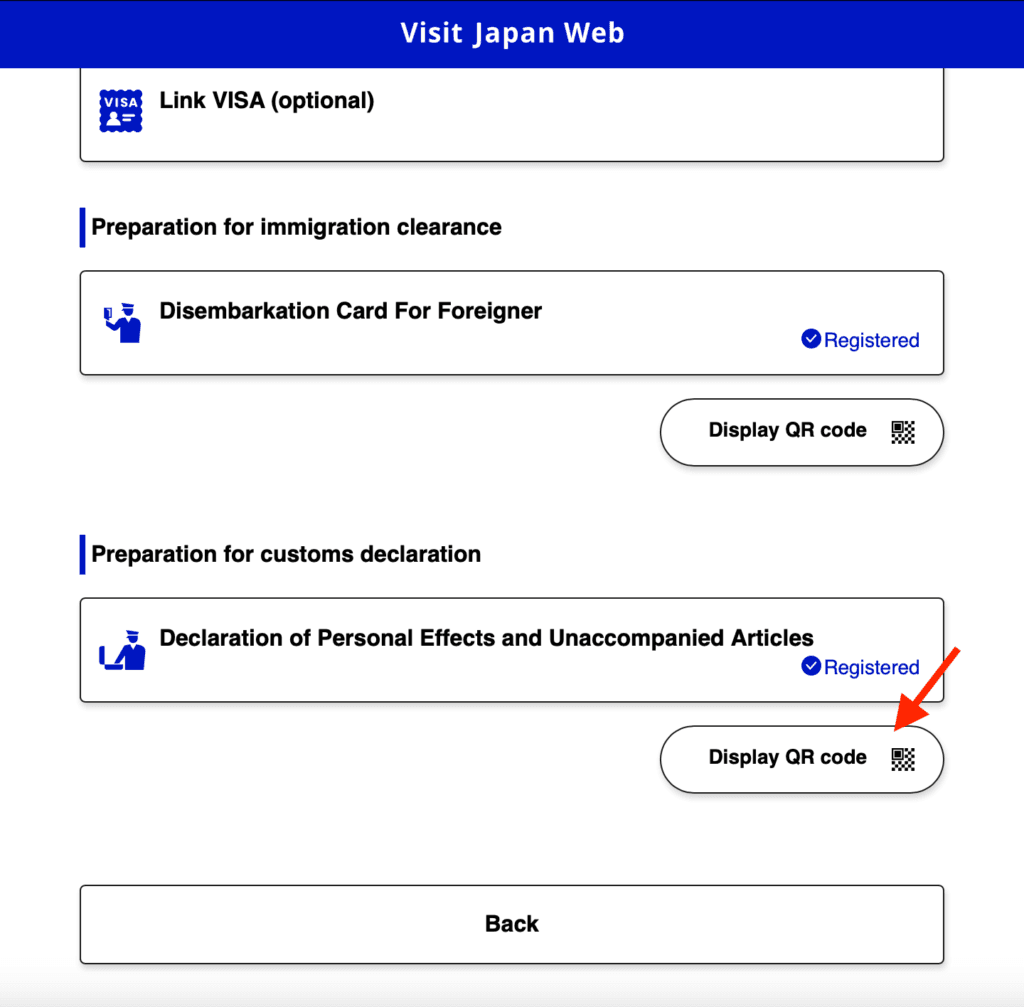
After completing registration, open Display QR code for the correct trip and traveller. The combined code is used for immigration and customs; follow airport staff instructions about where to present it with your passport. Keep it accessible on your phone and check it again if you change your details. The old customs-only QR screenshot below is historical, not a second current code to create.
Tax-Free Shopping QR Code and the November 2026 Change
Tax-free shopping is separate from arrival registration and has its own eligibility rules. For the system in effect through 31 October 2026, eligible visitors can create a tax-free shopping code for participating stores. The official tax-free instructions require passport scanning for this feature and say screenshots of the tax-free code cannot be used.
Step 1 – For the pre-November 2026 shopping process illustrated below, open the tax-free QR-code feature after arrival and follow its eligibility checks. Do not confuse this shopping code with the combined arrival code.
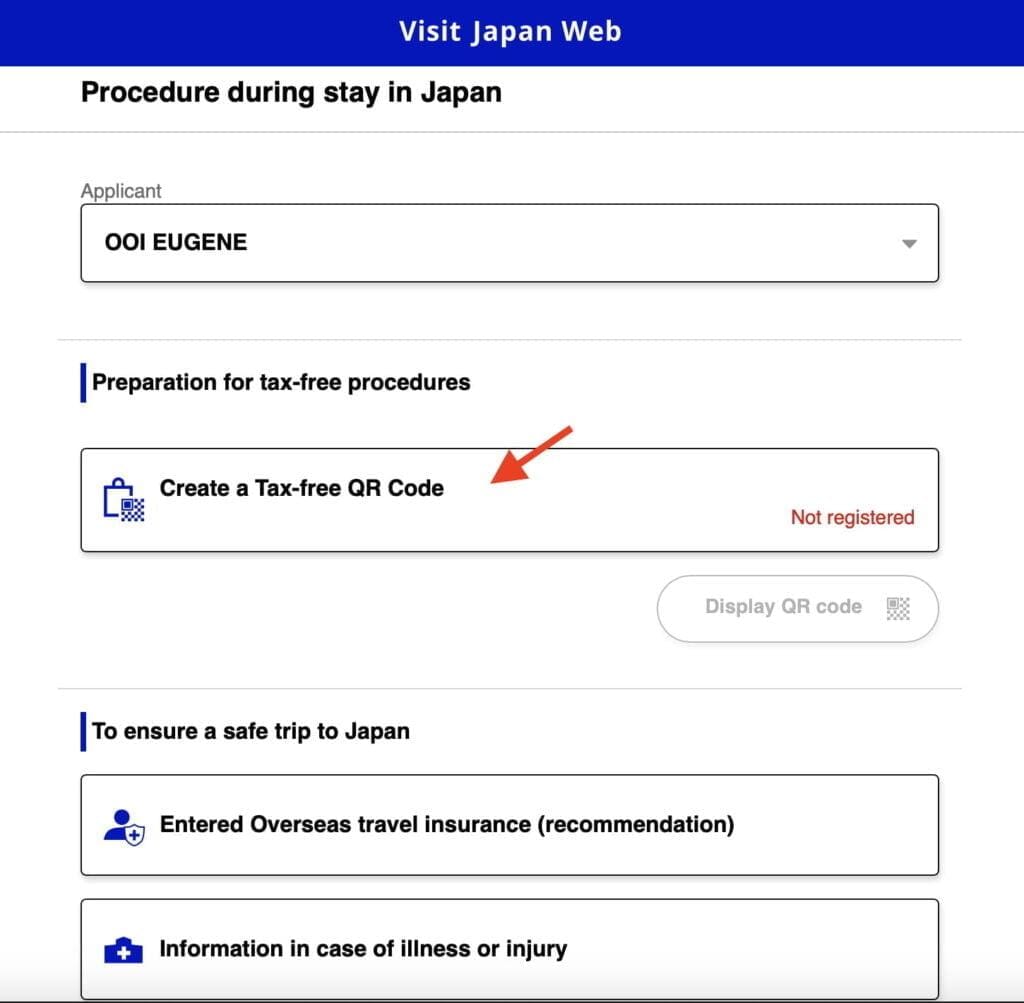
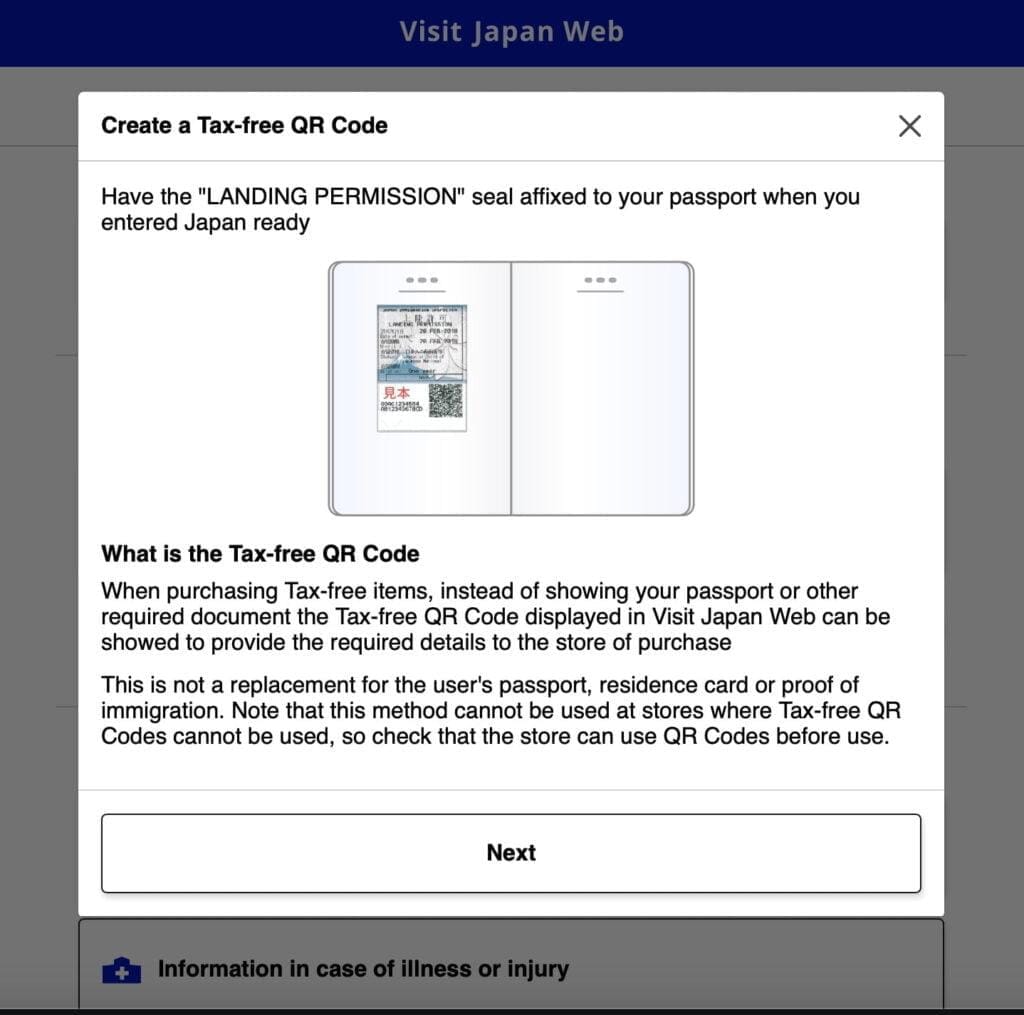
Step 2 – Follow the service’s prompts to scan the landing-permission seal in your passport. Show the live tax-free code at a participating store, not a screenshot. Keep your passport available and follow the retailer’s instructions.
Purchases from 1 November 2026: Japan is changing to a refund method. Eligible purchases are paid tax-inclusive, with the consumption-tax equivalent refunded after customs confirms the goods are being taken out of Japan. Check Japan Customs’ current tax-refund instructions and the retailer’s requirements; the older shopping screenshots above do not describe the full new process.
Should travellers complete Visit Japan Web before flying to Japan?
It is sensible to prepare before your flight, but Visit Japan Web is optional. Registration is free and does not grant a visa or guarantee admission. Use the official service, check your entry eligibility separately and follow the alternative procedures if you cannot use the online form. For resort transfers, arrival planning and what to pack, see our Club Med Japan Arrival Guide.
Visit Japan Web preparation checklist
Prepare these details before starting the online process.
- Passport details for every traveller
- Arrival flight number and date
- First accommodation address and telephone number
- A working email address
- Customs and immigration declaration information
- Combined arrival QR code accessible for the correct trip and traveller